Automatic Watering System
Inspired by the soldering and microcontroller programming in a university lecture (that I talk more about here), a friend and I decided to whip up the absolute classic in his dorm room: an automatic watering mechanism. His bonsai did also look like he needed it.
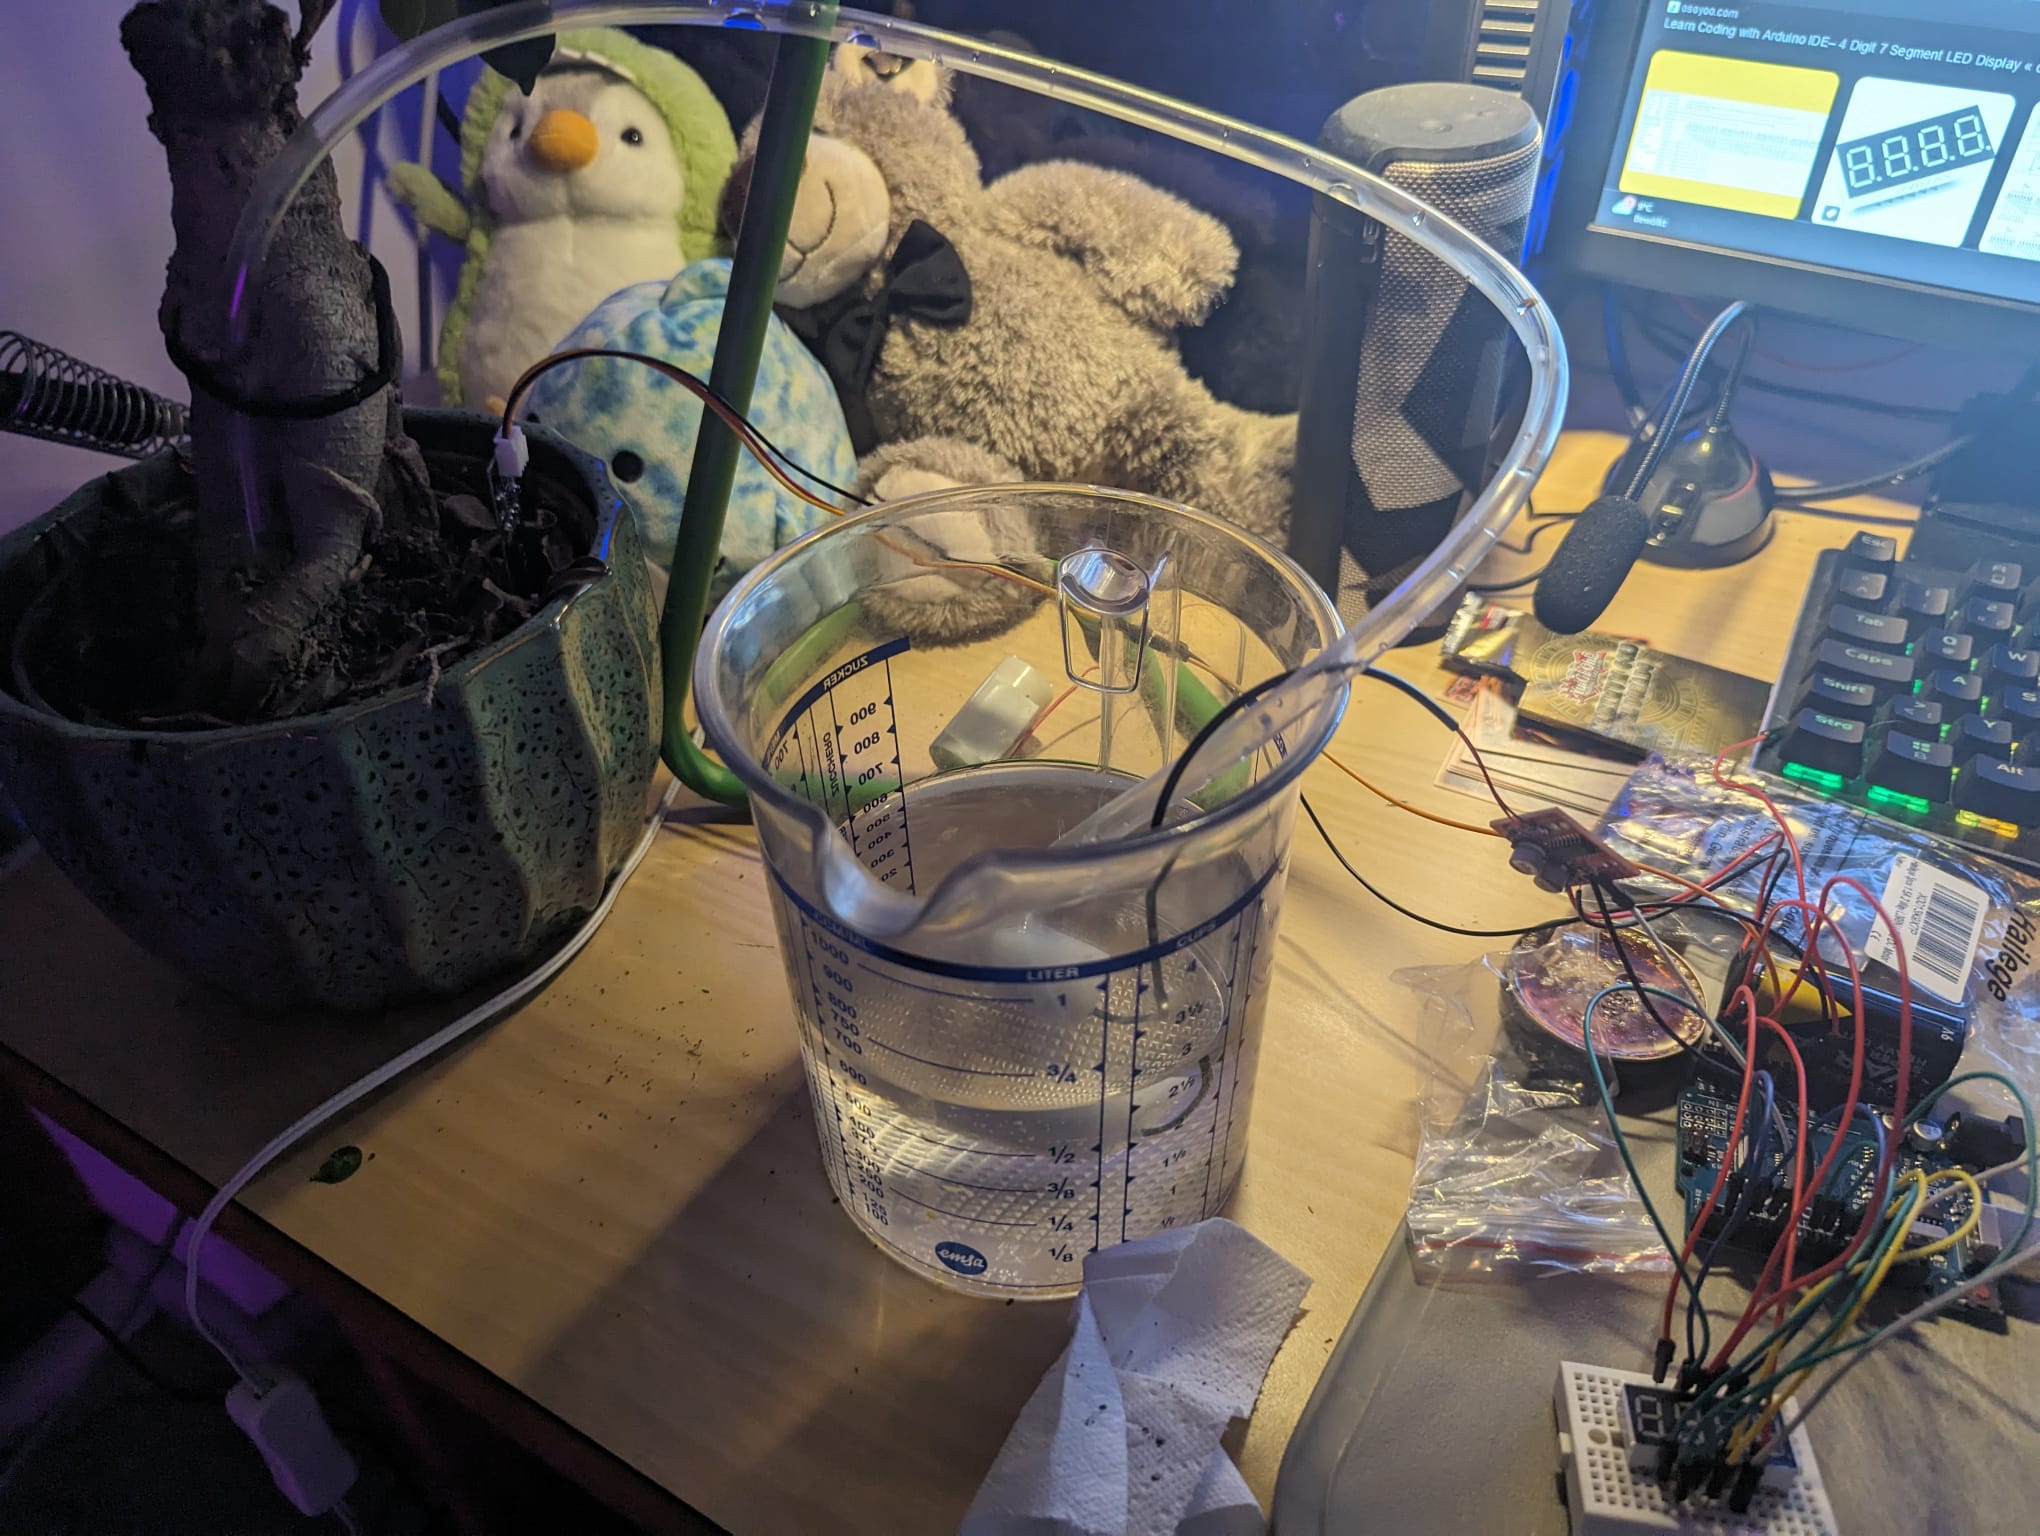
We came up with the simple mechanism seen above: a moisture sensor in the soil of the plant hooked up to an Arduino, which in turn drives an electric pump. Our idea was simple in that whenever the soil’s moisture fell below a threshold, one “watering” worth of water should be pumped from a reservoir into the soil.
Since my friend here already had an Arduino Uno and some cables lying around, we only ordered the pump, hose and sensor at first.
We hooked up the sensor’s power and ground cables to the appropriate sites on the Arduino and the signal to one of the Arduino’s analogue pins. Using the Arduino IDE, we only had to use basic pre-made functions to set up the pin into the correct mode and then read the analogue input data and print it to the Serial Monitor.
The Arduino IDE truly does make this an easy process. Uploading the code to the board did indeed yield a graph of the soil’s moisture.
Next, we hooked up the pump. The pump required external power since the Arduino cannot supply the necessary voltage. Thus, we added a pair of AA batteries into the mix. Since we did not need the pump going at different speeds, it was sufficient to wire it to one of the Arduino’s digital pins.
Again, we set up the pin to the right mode, and then it was only a matter of adding an extremely simple threshold check into the loop… et voilà, the pump was driven according to the sensor’s signal.
There is a reason why this sort of project is so typical for beginners. It is quite simple but a lot of fun. The tangible effect on the real world makes it a compelling experience.
1
2
3
4
5
6
7
8
9
10
11
12
13
14
15
16
17
18
19
20
21
22
23
24
25
26
27
28
29
void setup() {
  pinMode(MOIST, INPUT);

  pinMode(PUMP1, OUTPUT);
  pinMode(PUMP2, OUTPUT);

  ...
}

void loop() {
  int moisture = analogRead(MOIST);
  float percentage = min(max(mapfloat(moisture, lowerThreshold, upperThreshold, 0, 100), 0), 100);

  if (forcepump || (PUMPACTIVE && abs(millis()-currTime) > SensorCycleDurationSeconds * 1000 && moisture > upperThreshold)) {
    analogWrite(PUMP2, pumpStrength);
    currTime = millis();
    long animTime = millis();
    int animStep = 0;
    while(abs(millis()-currTime) < PumpCycleDurationSec*1000) {
      if (abs(millis()-animTime) > animStepTime) {
        animStep++;
        animTime = millis();
      }
      animate(animStep);
    }
    digitalWrite(PUMP2, LOW);
    currTime = millis();
  }
}
For some added flair, we later decided to purchase a simple seven-segment display in order to display the current moisture level of the soil (on a scale of 0 to 1023, as Arduino’s analogue pins do). This can also be seen in the image at the top when expanded.
1
2
3
4
5
6
7
8
9
10
11
12
13
14
15
16
17
18
19
20
21
22
23
24
25
26
27
28
29
30
31
32
33
34
35
36
37
38
39
40
41
42
43
44
45
void displayFloat(float num, float maximum = 100) {
  const bool leadingZero = ((int) num) == 0;

  int fullnum = max(min((int) (num * 100 + 0.5), maximum * 100), 0);
  int decimalPin;

  if (fullnum < 10000) {
    decimalPin = places[1];
  } else {
    decimalPin = places[2];
    fullnum /= 10;
  }

  digitalWrite(DIGdot, LOW);
  digitalWrite(decimalPin, HIGH);
  delay(displayDelay);
  digitalWrite(DIGdot, HIGH);
  digitalWrite(decimalPin, LOW);

  int c = 3;

  while (leadingZero ? c > 0 : fullnum > 0) {
    int currentDig = fullnum % 10;

    displayDig(currentDig, c, true);
    delay(displayDelay);
    displayDig(currentDig, c, false);

    fullnum /= 10;
    c--;
  }
}

void loop() {
  int moisture = analogRead(MOIST);
  float percentage = min(max(mapfloat(moisture, lowerThreshold, upperThreshold, 0, 100), 0), 100);
  float avgPercentage = percentage;
  for (int i = 0; i < runningAvgLen - 1; i++) {
    avgPercentage += runningAvg[i];
    runningAvg[i] = runningAvg[i+1];
  }
  runningAvg[runningAvgLen-1] = percentage;
  avgPercentage /= runningAvgLen;
  displayFloat(100 - ((float) round(avgPercentage * 10)) / 10);
}